Can Image to Image AI Change Backgrounds, Objects, and Colors?
Yes — image to image AI can swap backgrounds, alter objects, and recolour a photo with one prompt. Here is what works well, what does not, and how to word it.
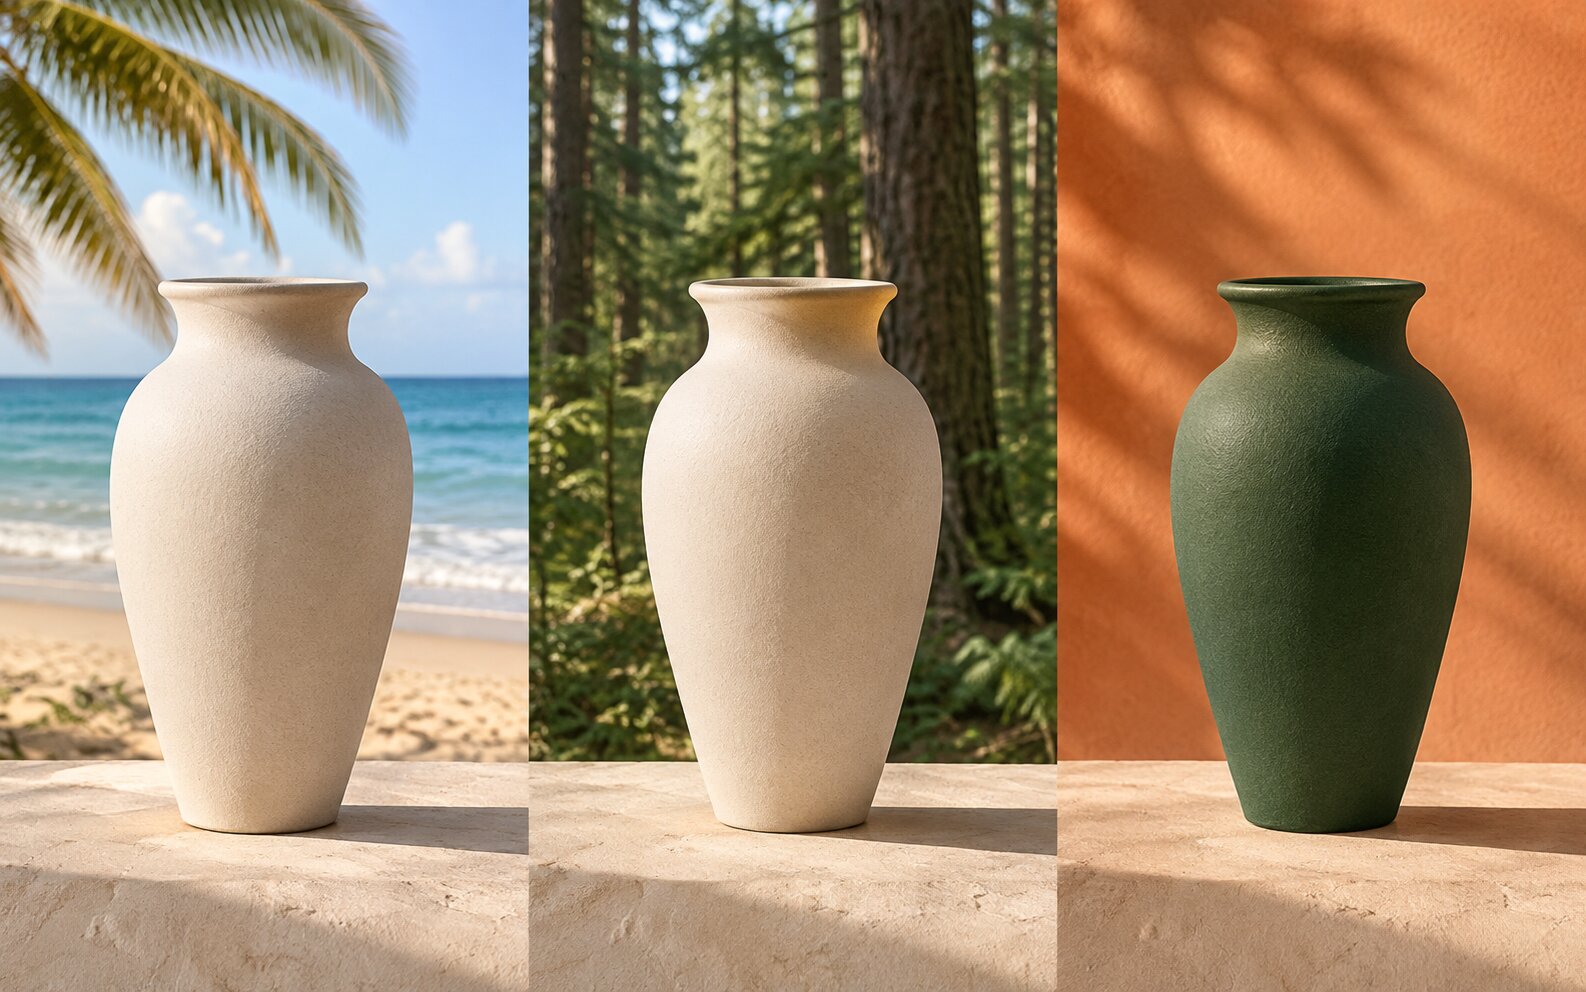
Yes. Image to image AI can replace the background of a photo, change an object in it, and recolour anything you point at — all three from the same single-image workflow. What differs is how much each one costs you in accuracy, and the honest ranking is clear: colour changes are precise, background changes are strong, object changes are the least reliable.
The Three Edits, Ranked
| Edit | Difficulty | What survives | Where it breaks |
|---|---|---|---|
| Change a colour | Low | Everything else stays put | Slightly over-saturated results if you do not name the tone |
| Change the background | Medium | Subject shape and pose; light is re-cast | Busy original backgrounds, thin hair, glass, reflective surfaces |
| Change an object | High | The general position and role of the object | Shape, count, text, and material accuracy |
Understanding this ranking saves the most time, because most retries come from asking the model to do the hardest thing at the lowest quality tier.
Changing Backgrounds
A background change asks the model to invent a new scene and re-light the subject to fit it. It is genuinely generative work rather than a cut-out, which is why the result reads as a real photograph.
Name the place and the light together. "Replace the background with a sunlit studio, soft light from the left" produces a coherent picture. "Replace the background with a studio" produces whatever the model thinks a studio looks like, which is bright and flat every time.
Ask to keep the subject sharp. "Keep the subject sharp and the edges clean" reliably beats leaving it unsaid, particularly around hair and shoulders.
Give the new background a depth. "A blurred city street at night with bokeh lights" is better than "a city street", because depth of field is one of the strongest cues that two images belong in one frame.
Crop out busy originals first. If the current background is cluttered, the model has to disentangle the subject from it. Cropping tighter, or cutting the subject out first with Try it freeAI Background RemoverRemove any background from a photo in one click — free., removes that whole class of failure.
For a flat colour, use the dedicated tool. Swapping a background for pure white or a single brand colour is exact and instant in Try it freeAI Background ChangerSwap photo backgrounds — solid colors, scenes, or AI-generated., and it does not re-render the subject at all. Use the generative route when the new background has to be a real place.
Changing Objects
This is the hardest of the three, because an object carries shape, material, and often text — and all three get regenerated.
Small removals work well. A bin in the corner, a lamppost, a bystander in the background, a stain on a wall. Say "remove the [object] and fill the gap naturally".
Adding is workable but unpredictable. The model may add two instead of one, or change the scale to suit the scene. "Add a single [object] to the [surface], roughly the same size as the [reference object]" reduces the variance, but check the count every time.
Material changes are safer than shape changes. "Make the jacket leather" survives better than "make the jacket a puffer", because a texture swap keeps the silhouette intact.
Never rely on it for text. A sign, a price tag, a logo, a screen — all of it gets redrawn and usually becomes nonsense. Cover it, crop it out, or re-add it in a design tool afterwards.
For a product that has to stay identical, do not regenerate it. Cut the product out, keep its pixels, and change only the scene around it.
Changing Colours
Colour is the cleanest edit because almost nothing structural is disturbed.
Name the tone, not just the hue. "A deep forest green" gives you one of many greens; "a muted, desaturated forest green, matte finish" gives you a specific one.
Keep the strength low. In the 0.2 to 0.4 band, the model recolours and barely touches anything else. Higher strengths start re-lighting the whole frame and you will find the shadows have changed colour too.
Specify what stays neutral. "Change the jacket to forest green, keep everything else the same colour" prevents the model from re-grading the whole image.
Watch the specular highlights. Glossy surfaces reflect a coloured object, and the model sometimes tints the highlight as well. A little is realistic; a lot looks like a colour cast.
For a single flat colour with hard edges, use a mask-based editor. Recolouring one specific panel on a product shot is a selection job, not a generation job.
A Workflow That Handles All Three
- Decide which kind of edit you are making. Colour, background, or object — they need different strength settings and different wording.
- Prepare the source. Crop tighter; upscale if the file is small; cut the subject out if the background is busy.
- Write one instruction with the survival clause. "Change the [thing] to [colour], keep the subject and the lighting unchanged."
- Set the strength for the edit type. Colour 0.2–0.4, background 0.4–0.6, object 0.35–0.55.
- Generate 2 to 4 variations and compare them side by side.
- Check the edges and the count. Hair halos, doubled objects, and drifting colours are the three failures you can catch in a second and fix in one more pass.
Common Problems and Solutions
| Symptom | Why it happens | What to do |
|---|---|---|
| The new background looks pasted on | The lighting was never specified | Name the light — "warm backlight from the left" |
| A halo appears around hair | The subject boundary met a busy background | Crop tighter, or cut the subject out first |
| The object came back with a different shape | Shape is regenerated, not copied | Lower the strength and describe the object more precisely |
| Two copies of the object appear | The count was not specified | Say "exactly one [object]" |
| Text on the object is garbled | Letterforms are not reliably reproduced | Keep labelled areas out of the edit |
| The whole image picked up a colour cast | The strength was high enough to re-grade the frame | Lower the strength and add "keep everything else the same colour" |
| The result is soft | The source was small or compressed | Upscale the source and generate at a higher tier |
Frequently Asked Questions
Can image to image AI change the background of a photo?
Yes, and it is the strongest of the three edits. The model re-renders the new background and re-lights the subject to match it, so the result reads as one photograph rather than a cut-out pasted onto a plate. Name the new place and the light — "replace the background with a sunlit studio, soft light from the left" — and ask to keep the subject sharp.
Can it change the colour of an object?
Yes, and colour edits are the most precise thing the model does. A red car to matte black, a white shirt to a mustard overshirt, a blue wall to warm terracotta. Keep the strength low to medium for colour work so the object keeps its shape and every other colour stays where it was.
Can it add or remove objects?
Removing is reliable when the object is small and the area behind it is simple. Adding is workable but less predictable — the model may change the scale, add extra copies, or place the object oddly. For anything that must be exact, use a dedicated cut-out and compositing tool.
Why does the edited object look slightly different?
Shape, texture, and text on an object are all regenerated rather than copied, so a labelled bottle comes back with a different label and a slightly different silhouette. If the item is a product whose accuracy matters, cut it out instead of asking the model to repaint it.
Will the new background match the original lighting?
It will try, and it succeeds most of the time when you name the light — "warm backlight from the left", "soft overcast daylight". If you do not specify it, the model picks the most common lighting for that scene type, which can look slightly pasted on.
Can I make these edits on my phone?
Yes. The generation runs in the cloud, so the only requirement is a modern browser. Dream Pixel AI compresses large photos in the browser before uploading, which means a 12MP phone photo usually goes through without manual resizing.
Which Tool Should You Use for Which Edit?
- Best for all three edits with one upload: Image To Image AI by Dream Pixel AI — one photo, one prompt, HD output.
- Best for a pixel-perfect cut-out with no re-generation: Try it freeAI Background RemoverRemove any background from a photo in one click — free..
- Best for a flat colour background or an exact brand colour: Try it freeAI Background ChangerSwap photo backgrounds — solid colors, scenes, or AI-generated..
- Best for putting a product into a new room or lifestyle scene: Dream Pixel AI Image Combiner.
Open Try it freeAI Image EditorTransform a single photo with a text prompt — restyle, re-light, re-imagine. and start with the easiest of the three — a colour change. It teaches you the strength control in about a minute, and everything else builds on it.
Want a workflow question answered? Get in touch — we read every message.
Try these tools
Try it freeAI Image EditorTransform a single photo with a text prompt — restyle, re-light, re-imagine.Try it freeAI Background ChangerSwap photo backgrounds — solid colors, scenes, or AI-generated.Try it freeAI Background RemoverRemove any background from a photo in one click — free.Try it freeAI Image CombinerCombine up to 8 photos into a single AI-composed image.Sources
- Google Research — Imagen Editor — Reference for text-guided structural edits to a supplied photograph.
- Adobe — Photoshop Generative Fill documentation — Reference for how commercial editors expose generative background replacement inside a creative workflow.
- Hugging Face — Diffusers documentation — Reference for the strength parameter and how the starting image conditions the denoising process.