How to Use Image to Image AI to Transform Your Photos?
A practical walkthrough for transforming photos with image to image AI — the five-step workflow, prompt templates for each edit, and how to fix a bad result.
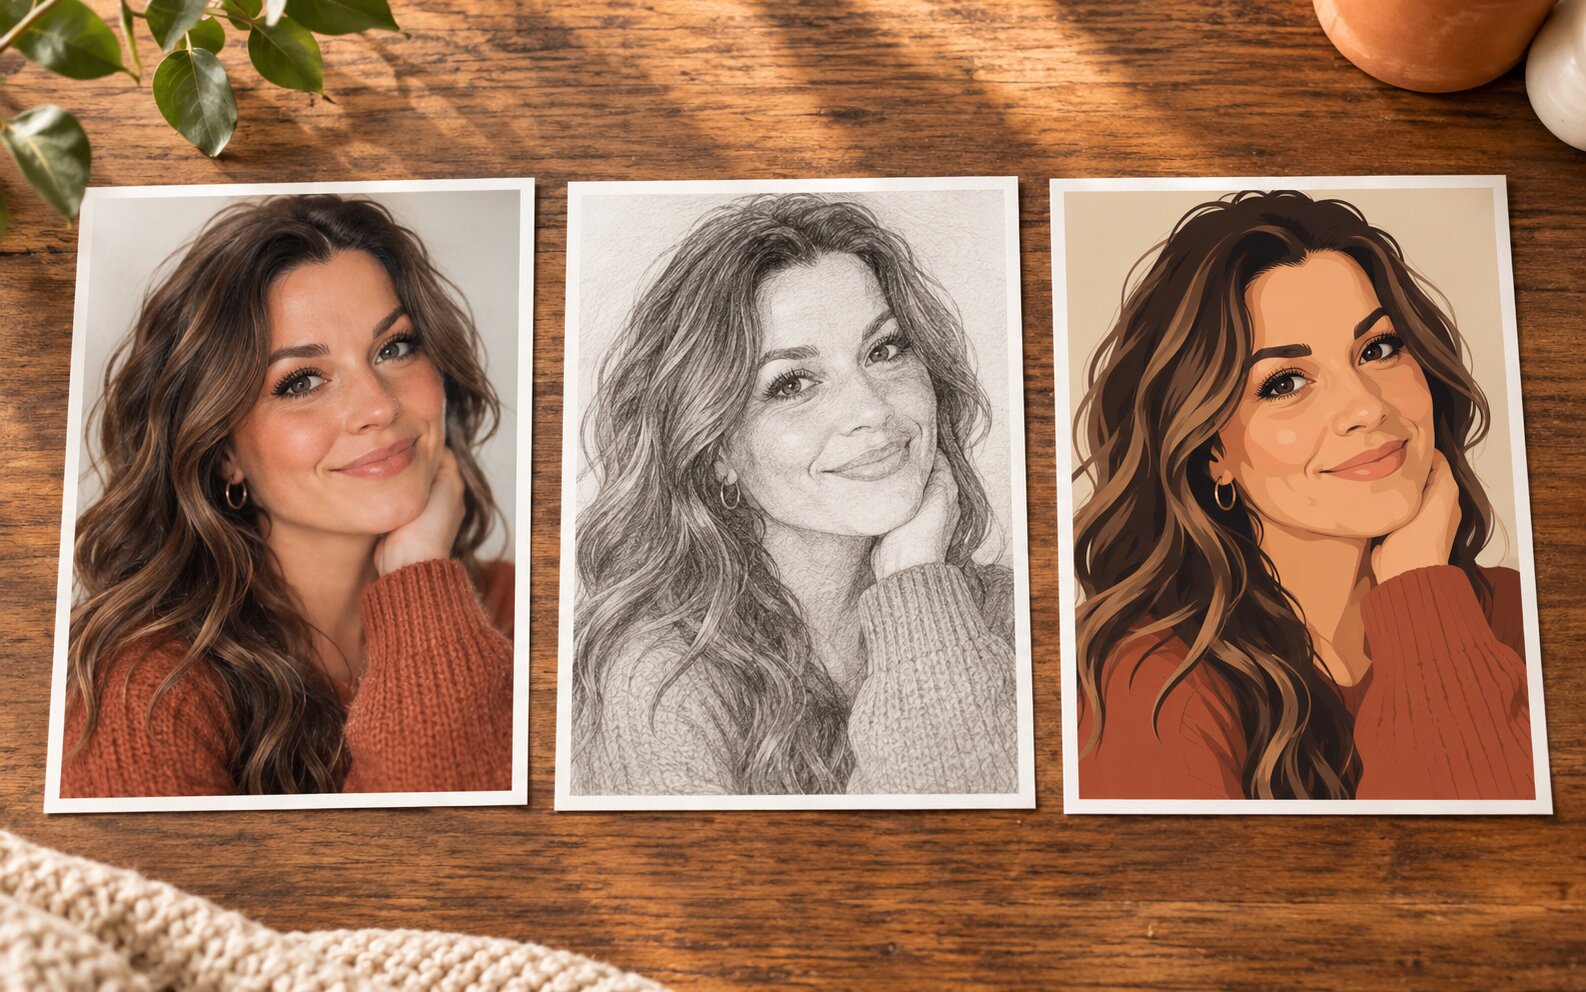
To transform a photo with image to image AI you upload one picture, describe the finished look in a sentence, and let the model re-render the frame. The whole edit is one generation — no masks, no layers, no brush work. The difference between a good result and a wasted one is almost always the prompt: what you describe and what you say to keep.
The Five-Step Workflow
- Choose the photo carefully. A sharp subject, simple background, and enough resolution (1024px on the long edge at minimum). Crop before uploading — the model gives you more usable detail per pixel when the subject fills the frame.
- Write one instruction. Name the change and, in the same sentence, what must stay. One change per generation.
- Set the strength. Middle of the range for a normal edit. Lower for a colour change, higher for a full restyle.
- Choose quality and aspect ratio. Match the ratio to where the image will live, and pick the cheapest tier that holds the detail you care about.
- Generate variations, then refine. Two to four outputs, pick the closest, then adjust one variable and go again.
Prompt Patterns That Work
Every edit you will ever want falls into one of these families. Fill in the bracketed parts and you have a prompt that lands on the first try far more often than not.
| Edit type | Prompt pattern | Typical strength |
|---|---|---|
| Season change | "The same photo, now in [winter/summer/autumn], [snow/green leaves/fallen leaves] on the ground, overcast winter light, keep the pose and the composition" | 0.55–0.7 |
| Style transfer | "Restyle this photo as [a 1990s film photograph / an oil painting / a pencil sketch / a clay render], keep the face and the pose" | 0.5–0.7 |
| Background swap | "Replace the background with [a sunlit studio / a neon-lit street / a white seamless backdrop], match the lighting to the subject" | 0.4–0.6 |
| Lighting change | "Relight this photo as [golden hour backlight / soft overcast / cool studio light], keep the composition" | 0.3–0.45 |
| Colour grade | "[Muted and desaturated / warm and faded film tones / crisp and high-contrast], keep everything else unchanged" | 0.2–0.35 |
| Object removal | "Remove the [lamppost / bin / person in the background] and fill the gap naturally" | 0.3–0.45 |
| Object or colour change | "Change the [red car / blue jacket / white mug] to [a matte black car / a mustard jacket / a ceramic mug], keep everything else" | 0.35–0.5 |
| Product shot | "Turn this into a clean studio product photo on a white background, soft even light, sharp detail" | 0.6–0.8 |
| Mood shift | "Give this photo a [moody cinematic / cheerful bright / nostalgic dreamy] atmosphere, keep the subject" | 0.4–0.55 |
| Upscale and restore | "Restore this photo to sharp detail, remove grain and compression artefacts, keep the content identical" | 0.2–0.35 |
Two rules hold across every row: describe the finished photograph rather than the editing operation, and always name what to keep.
What to Do When a Result Is Wrong
Almost every disappointing edit has one of five causes. Change exactly one thing and regenerate.
| What you see | Most likely cause | The one change to make |
|---|---|---|
| The subject drifted or the face softened | Strength too high | Drop the strength by 0.15 |
| Almost nothing changed | Strength too low | Raise the strength by 0.15 |
| The scene is unrecognisable from the original | Prompt describes a new image instead of an edit | Rewrite as an edit and lower the strength |
| The background turned to mush | The original background was busy | Crop tighter, or cut the subject out first |
| Colours are garish | The prompt implied saturation | Name the palette explicitly |
Changing the prompt, the strength, and the tier all at once is the most common reason a workflow stalls — you can no longer tell which change fixed the problem.
Preparing the Source Photo
The model can only work with what is in the file. Five minutes of preparation removes most failures:
- Crop tight. A subject at 30% of the frame keeps maybe a third of the detail it could have.
- Straighten and level. A tilted horizon is re-rendered as a tilted horizon, more visibly than in the original.
- Blow out nothing. Crushed shadows and clipped highlights give the model no colour information to work with.
- Keep it in focus. Motion blur and missed focus get amplified rather than smoothed.
- Upscale small files first. Under 1024px, faces and fine edges are the first things to go. Try it freeAI Image UpscalerUpscale photos up to 4× without losing detail. fixes that in one pass.
Batch Workflow for Consistent Results
Editing a set of photos — a product range, a portrait series, a set of listing shots — is where image to image AI earns its keep, but only if the wording stays fixed.
- Lock one prompt for the whole batch and never paraphrase it between files.
- Normalise every source first with the same crop ratio and the same lighting correction.
- Fix the ratio and tier once so the batch is visually consistent.
- Generate two variations per file and pick from a single pass, not file by file.
- Review the set as a whole. One outlier among twenty consistent images is more visible than twenty perfect ones.
If the batch drifts, the drift is almost always in the lighting or the finish — those are the parts a model reinterprets most freely. Restate them in the prompt rather than editing each result.
Common Problems and Solutions
| Symptom | Why it happens | What to do |
|---|---|---|
| The face looks slightly unfamiliar | The model re-rendered the face rather than copying it | Lower the strength, raise the quality tier, add "preserve facial features exactly" |
| The result is a new image, not an edit | The prompt describes a scene instead of a transformation | Add "keep the original composition and framing" |
| Colours overshoot | The instruction implied a vivid look | Name the palette: "muted, desaturated, faded film tones" |
| Edges around hair look cut out | The subject boundary met a busy background | Crop so the edge lands on a clean area, or work from a cut-out |
| Text and logos are garbled | Letterforms are not reliably reproduced | Keep text areas unchanged, or re-add them in a design tool |
| Results differ run to run | Image generation is stochastic | Compare variations side by side instead of one at a time |
Frequently Asked Questions
How do I transform a photo with image to image AI?
Upload one photo, write a single instruction describing the finished look you want, and mention in the same sentence what should stay the same — "turn this into a 1990s film photo, keep the face". Set the strength to the middle range, pick the aspect ratio you will use, and generate. If the result is close but not right, change one thing and run it again.
What should I write in the prompt?
Write the caption of the photograph you want. Name the subject and framing, the style or treatment, the lighting, and the mood — then add what to keep. "Backlit portrait in a wheat field at golden hour, keep the face and the pose" is a complete instruction. Adjectives without structure ("make it beautiful") are what produce generic output.
How do I keep my subject from being distorted?
Lower the strength, use a sharp source photo, crop so the subject fills more of the frame, and say what to preserve. If you need heavy restructuring, it is usually better to do it in two passes — a moderate restyle first, then a second light edit on the result.
Can I transform several photos the same way?
Yes, and consistency comes from writing the same prompt every time. Keep the wording of the transformation identical and only change the file. If the outputs drift apart in style, restate the lighting and the finish in the prompt, because those are the parts models reinterpret most often.
How many attempts should I expect to need?
For a colour or lighting change, one or two attempts is normal. For a full restyle, expect to generate two to four variations and pick the best. If you have run five or six and nothing is close, the problem is the source photo or the strength setting, not the wording.
Is there a free way to try image to image AI?
Yes — Dream Pixel AI gives you free credits to start, with no card needed for the trial. Upload one photo and run your first edit at no cost.
Which Tool Should You Use for Each Part?
- Best for one-photo transformations in a browser: Image To Image AI by Dream Pixel AI — one upload, one prompt, HD output, no layers.
- Best for building a full product set from one shot: Try it freeAI Photoshoot GeneratorTurn a single product photo into a full photo set. — it turns a single product photo into a staged series.
- Best for a clean cut-out to reuse elsewhere: Try it freeAI Background RemoverRemove any background from a photo in one click — free..
- Best for merging several photos into one scene: Dream Pixel AI Image Combiner.
Open Try it freeAI Image EditorTransform a single photo with a text prompt — restyle, re-light, re-imagine. and run one edit with a prompt from the table above — the pattern table is the part worth remembering, not any single prompt.
Want a workflow question answered? Get in touch — we read every message.
Try these tools
Try it freeAI Image EditorTransform a single photo with a text prompt — restyle, re-light, re-imagine.Try it freeAI Background ChangerSwap photo backgrounds — solid colors, scenes, or AI-generated.Try it freeAI Photoshoot GeneratorTurn a single product photo into a full photo set.Try it freeAI Image UpscalerUpscale photos up to 4× without losing detail.Sources
- Hugging Face — Diffusers documentation — Reference for the strength parameter and image conditioning in image-to-image pipelines.
- Google Research — Imagen Editor — Reference for how text-guided edits preserve the structure of the supplied photograph.
- Stability AI — Research — Reference for latent-space diffusion encoding and decoding that underlies image-to-image generation.