How to Combine Two Images with AI (Step by Step)
Combine two images with AI in five steps — upload, order your references, write a scene prompt, pick quality, and generate. Includes prompt fixes that work.
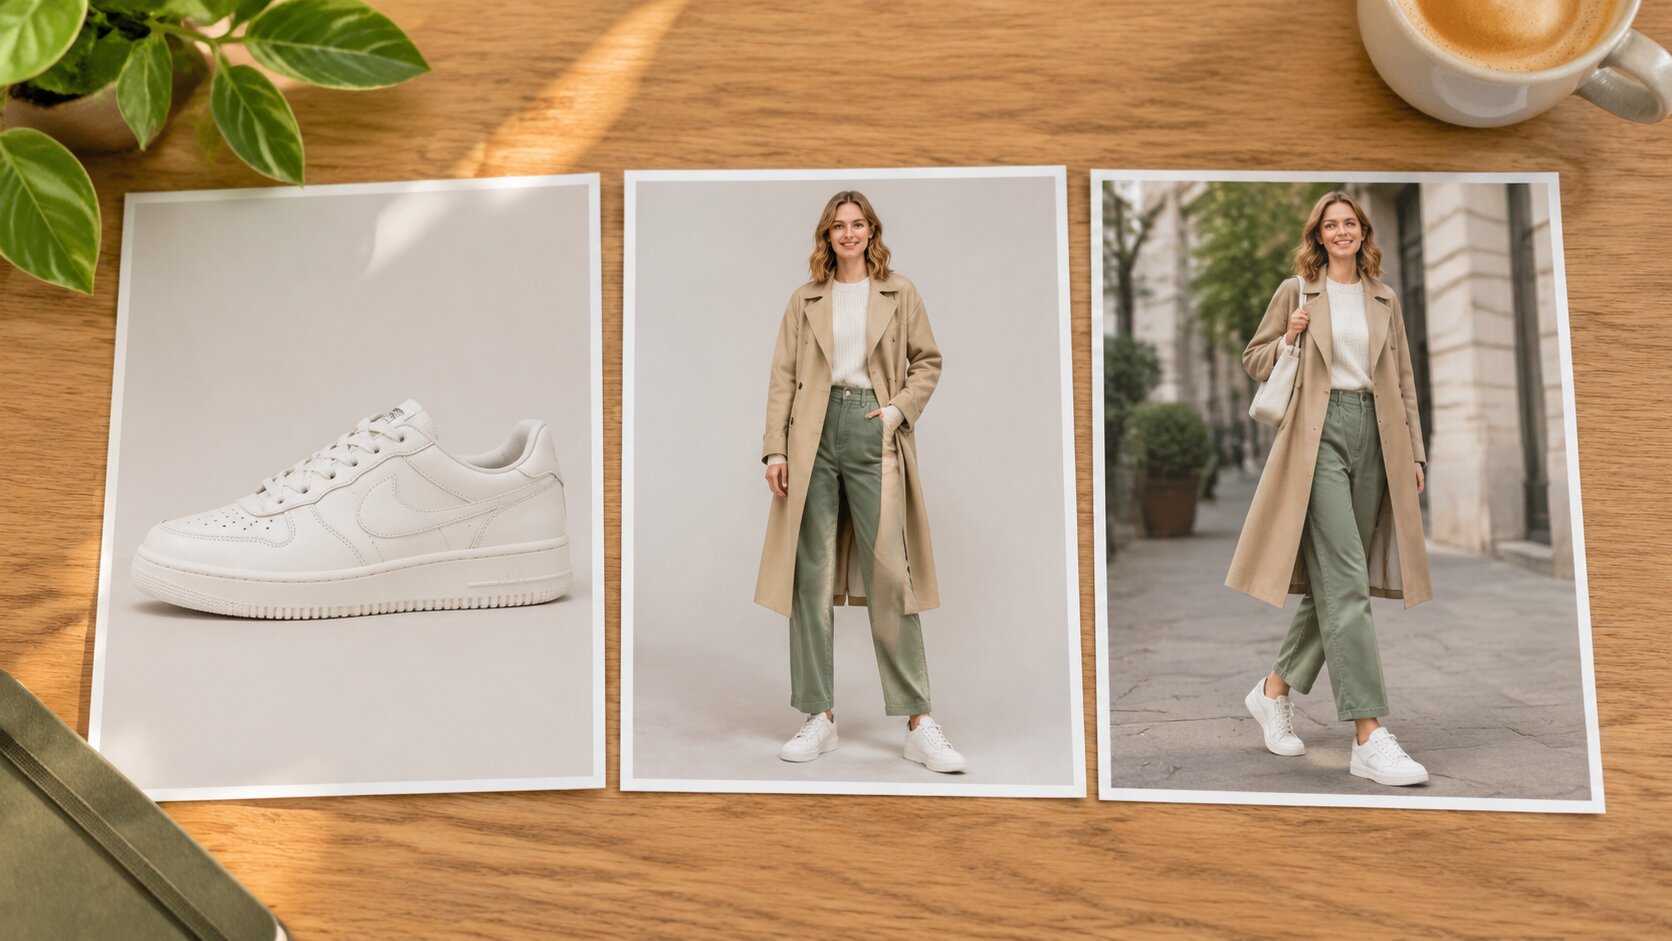
Combining two images with AI takes about two minutes of work: you upload both photos, write one sentence describing the picture you want, pick a quality tier, and press generate. The model then rebuilds a single frame where both subjects appear together — matching the light, casting the right shadows, and blending the edges so the result reads as one photograph rather than a collage.
How Does Combining Two Images Work?
Two independent paths run at once inside the model, and the output has to satisfy both:
- Your prompt decides the scene — who is where, what the setting looks like, what the light does.
- Your two reference photos decide the subjects — their faces, their shapes, their colours, their textures.
The model starts from noise and resolves it in stages: composition first, then identities, then surface detail. If the composition stage goes wrong, later stages cannot rescue it, which is why most bad merges are fixed by rewriting the prompt rather than by generating again.
How to Combine Two Images with AI — Step by Step
Step 1 — Choose your two photos
Pick the images that will actually look good together. Before uploading, check three things:
- Sharpness. A soft photo stays soft. Faces especially need detail.
- Lighting direction. Both subjects lit from the same side will merge far more cleanly.
- Framing. Similar camera height and distance. A close-up face next to a full-body shot produces distorted proportions.
If one photo fails the check, fix it first with Try it freeAI Image EditorTransform a single photo with a text prompt — restyle, re-light, re-imagine. — re-light it, crop it, or upscale it — and then merge.
Step 2 — Upload in the right order
Drop in your first photo, then your second. The first upload anchors the scene; the second supplies the element that gets placed into it.
- Combining two people? Lead with the person who should be more prominent, or with the photo that has the better background.
- Combining a product with a model? Lead with the product.
- Combining a product with a room? Lead with the room.
Step 3 — Write the prompt as a caption, not an instruction
The single biggest improvement to merge quality is writing the prompt as a description of the finished photograph.
| Weak prompt | Why it underperforms | Better prompt |
|---|---|---|
| "Merge these two" | No scene, no framing, no light | "Two people sitting on a rooftop balcony at golden hour, city skyline behind them, warm backlight" |
| "Put the shoe on the model" | Task language, no scene | "A running shoe on the model's feet, she is standing on a marble floor in a bright studio" |
| "Make it look nice" | Nothing to act on | "A cozy cafe table with the coffee cup in front of the laptop, soft morning window light" |
| "Put her in the beach photo" | Ambiguous about scale and angle | "The woman standing on the sand in the foreground, shot from behind at golden hour, hair moving in the wind" |
A useful formula: subjects + placement + setting + lighting + framing + style.
- Subjects: "two people", "a woman and a sneaker"
- Placement: "standing side by side on the left third"
- Setting: "a sunlit rooftop balcony"
- Lighting: "warm backlight from the right"
- Framing: "waist-up, shallow depth of field"
- Style: "photorealistic, natural skin texture"
Step 4 — Set quality and aspect ratio
Quality tiers control how carefully the model reconstructs faces and fine edges. Low tiers are fine for a quick concept check; use a higher tier for anything where a face is visible or the image will be published.
Choose the aspect ratio for where the image will live: 1:1 for a profile or product tile, 4:5 for a feed post, 16:9 for a banner, 9:16 for a story.
Step 5 — Generate, compare, refine
Run two to four variations in one go. Pick the best, then decide whether to refine or to keep it.
Refine by changing one thing at a time. If the layout is wrong, adjust placement. If the faces look soft, raise the quality tier. If the light looks wrong, name the light. Rewriting the whole prompt usually lands you somewhere new rather than somewhere better.
What Types of Images Combine Best?
Two people into one scene. The most common use and the one with the best results. Sharp, front-facing, evenly lit photos merge cleanly.
A product onto a model. The standard e-commerce shortcut: one product shoot becomes a full lifestyle set.
A product into a room. A sofa, a watch, a candle — placed into a styled interior.
A person into a landscape. Two people in two places, combined into one shared moment.
A packshot with a background plate. Studio packshot plus location background, with the model asked to match the shadows.
A flat-lay with an ingredient. Food and packaging composed into one shot.
A photo with an illustration. A drawing combined with a photograph for cover art and storyboards.
How to Get More Realistic Results
Pre-normalise your sources. Crop both to a similar scale, match them to similar brightness, and remove distracting backgrounds. A five-minute prep pass beats twenty prompt attempts.
State the number of people. "Exactly two people, no other people in frame" prevents a common failure where the model invents a third.
Say how big each subject should be. "Head and shoulders, filling the left half of the frame" is a scale instruction the model can use.
Name the light. "Soft window light from the left", "golden hour backlight", "even studio softbox" — all of these do more than "nice lighting".
Keep faces unoccluded. Sunglasses, hands over faces, and strong backlight make identity much harder to hold onto.
Generate at the top quality tier when a face matters. The difference between tiers is most visible exactly where you care about it.
Upscale the winner for print. A 1K result is a screen asset. For anything larger, run it through Try it freeAI Image UpscalerUpscale photos up to 4× without losing detail..
Common Problems and Solutions
| Problem | Cause | Fix |
|---|---|---|
| One person looks pasted in | Lighting or colour temperature mismatch | Re-light the odd photo, then name the light in the prompt |
| Faces are subtly wrong | Identity embedding built from a soft photo | Use a sharper source, raise the quality tier, add "preserve facial features exactly" |
| Subjects are the wrong size | No scale information given | State the framing explicitly |
| A third person appears | Subject count was ambiguous | Say "exactly two people" |
| Product label is unreadable | Letterforms are not reproduced reliably | Add the text afterwards in a design tool |
| The image looks like a collage | The model could not reconcile the edges | Use a tighter crop, or generate several variations and pick the smoothest |
| Colours shifted | The model re-rendered the subject | Correct the colour afterwards, or use a tier with a stronger reference adherence |
Frequently Asked Questions
How do I combine two images with AI?
Upload both images to an AI image combiner, describe the finished scene in one or two sentences, choose a quality tier and aspect ratio, then generate. The model rebuilds a single picture where both subjects appear together with unified lighting. You can download the result or refine the prompt and run it again.
Which image should I upload first?
Upload the image that carries the scene or the main subject first. Most combiners treat the first upload as the anchor and place later uploads into that frame. If you are combining a product with a model photo, put the product first.
Do the two photos need to have the same lighting?
Not strictly — the model will unify the lighting on its own — but photos that already share a similar light direction produce noticeably better results. If the mismatch is severe, re-light one source photo before merging.
How long does it take to combine two images with AI?
Two minutes of work and 5 to 15 seconds of generation. Uploading two photos from a phone takes a few seconds on a normal connection, and large files are compressed in the browser before they are sent.
Can I combine two images on my phone?
Yes. The combination happens on the server, so any modern phone browser works. Dream Pixel AI also offers a separate face swap flow if you want to swap a face rather than compose a scene.
Will my combined image keep the exact colours of my original?
Close, but not exact. The model re-renders the subject, so colour shifts of a few percent are normal and often actually help the composite look coherent. If an exact brand colour is critical, correct it afterwards in a design tool.
Which AI Image Combiner Should You Use?
- Best for combining two photos in a browser: Dream Pixel AI Image Combiner — two to eight inputs, up to four variations per run, prompt-driven layout.
- Best for preparing photos before merging: Dream Pixel AI Image Editor — re-light, crop, and upscale each source first.
- Best for swapping a face rather than composing a scene: Dream Pixel AI Face Swap.
- Best for exact manual control: Photoshop, if you already know layers and masks.
The fastest way to learn is one real merge. Open Try it freeAI Image CombinerCombine up to 8 photos into a single AI-composed image., upload two photos you care about, and try the caption formula above.
Want a workflow question answered? Get in touch — we read every message.
Try these tools
Try it freeAI Image CombinerCombine up to 8 photos into a single AI-composed image.Try it freeAI Image EditorTransform a single photo with a text prompt — restyle, re-light, re-imagine.Try it freeAI Background ChangerSwap photo backgrounds — solid colors, scenes, or AI-generated.Try it freeAI Photoshoot GeneratorTurn a single product photo into a full photo set.Sources
- Adobe — Photoshop Generative Fill documentation — Reference for the manual compositing workflow that AI combining replaces for most everyday jobs.
- Google Research — Imagen Editor — Reference for text-guided structural editing of a supplied photograph.